Tuesday, August 22, 2006

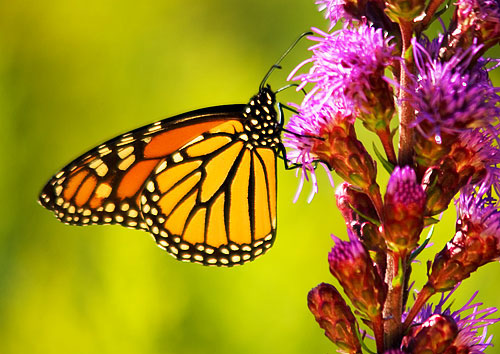
Want butterflies? Try meadow blazingstar


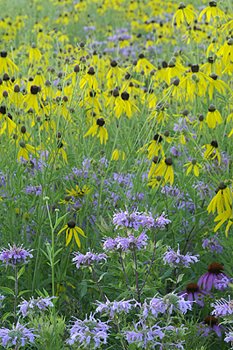
We have a two-acre meadow that was planted from seed in spring 2000 by Wildflower Farm. It's a mixture of North American prairie natives, both flowers and grasses. Why a meadow? As I said to my husband when we were in the planning stages: there is no way we're going to mow 10 acres.

The meadow required a good deal of patience. It took three years after sowing for the plants to get blooming. Of all the garden areas we have, I enjoy the meadow most because it attracts masses of birds and butterflies and it doesn't have to be weeded.

The wildflower meadow is at its most beautiful in July (as in the picture below), but there is a meadow plant that comes into its prime in late August into September: meadow blazingstar (Liatris ligulistylus), hardy to Zone 4.

Unlike the single flower spike of most blazingstars, meadow blazingstar is branched and has numerous individual flowers that bloom over four to six weeks. The plant grows three to five feet tall and thrives in rich, loamy soils.

In Canada, you can get seeds from Wildflower Farm or buy plants from them in spring. US sources include: Prairie Nursery and High Country Gardens.

To grow meadow blazingstar from seed, follow these instructions from Wildflower Farm:
Use cold, moist stratification. Mix seed with moist but not wet, sterile growing medium. Place mixture in a labeled, sealed plastic bag and store in refrigerator for six to eight weeks. Note: Some seed may germinate in the storage bag if moist stratified too long. If sprouting occurs, plant immediately. Another method is to sow seed outdoors in late autumn so that they may overwinter.
More wildflower meadow information is here.

Friday, August 18, 2006

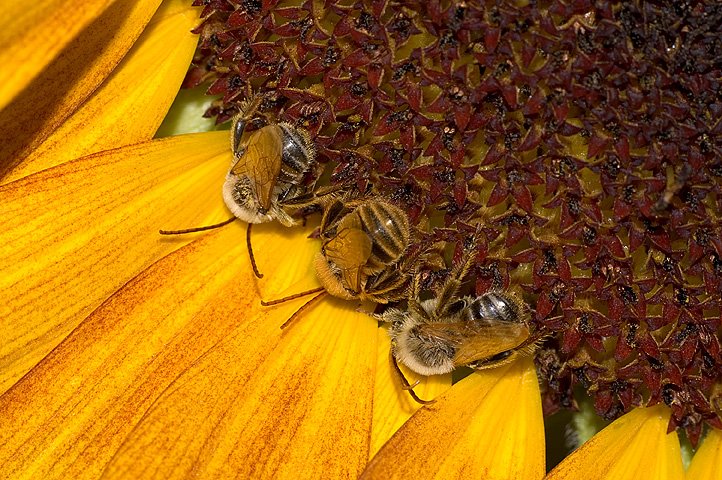
Photographing three sleepy bees


Sunflowers are a lot of fun to take pictures of. You can play with them in so many ways - up against the blue sky, as in my previous post, or really close up.

The other morning I saw three bees snoozing in a sunflower. They had arranged themselves neatly side by side and they looked so sweet that I just had to photograph them.

Unfortunately, it was getting a bit late for morning shooting. A breeze had started up and the sunflower was moving around too much. I knew I had to use a macro lens with an extension tube to capture any detail in the bees, and that nothing would be sharp with all that movement.

Using a flash is not one of my strengths - in my experience flash ruins most pictures - but this was definitely a time to use it. Without it there was no way of getting the shot.

Generally flash blows out all the detail, so I dialed back the flash power using the flash compensation control, and the shot worked out very well.

The beauty of digital cameras is that you can take the shot, review it and then dial in some flash or exposure compensation.

Before digital, you had to be very experienced and knowlegable about flash to get a shot like this one right. With digital, you still have to know how to make exposure corrections, but being able to see the results right away makes it so much easier.

No wonder I'll never go back to slides.

Bird-planted sunflowers


Another one of the "happy accidents" in our garden are sunflowers planted by the birds. They pop up in many spots, particularly mulched areas around trees, where birds perch to eat the seeds. It's always fun to see them show their heads and start blooming.

I've grown many different hybrid sunflowers, but when they go to seed and come up on their own, they tend to revert to giant plants with big yellow heads that produce a lot of seeds.

Before I came to my senses, I had a huge cutting/vegetable garden about 25 by 50 feet. There I would always grow about 15 or 20 sunflowers of different kinds at the back. (I gave it up because it was too much work: by June it was always the straw that broke my camel's back.)

From this start, thanks to birds dropping the seeds, we now have sunflowers in many spots on our acreage. Usually they grow where the self-sown plants were the year before, but often appear where I don't expect them.

The gorgeous one shown above popped up this summer in one of our shrub borders, which is quite a distance from where sunflowers grew the year before. It's about 9 feet tall (I went out and measured).

When I gave up the big cutting/veggie garden, I regretted losing space for sunflowers, but I need not have worried. As long as we don't weed them out, we will always have a lots of cheerful sunflowers around.

I leave the plants up well into fall until the birds have eaten most of the seeds, and that seems to ensure their spread. When they come up in late spring, I sometimes I move one or two seedlings into gaps in the garden.

If you've never grown sunflowers before, they are quite easy from seed and great for kids' gardens.

Previous happy accident posts: Gladioli - Dahlberg daisy

Sunday, August 13, 2006

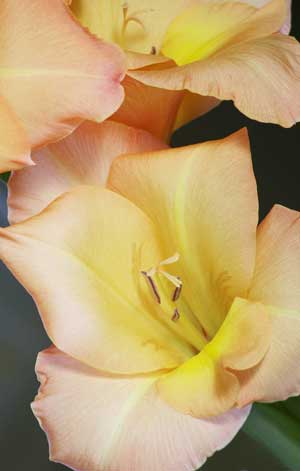
My gladioli just keep coming back


I enjoy glads as cut flowers, so each season I have a few growing in the vegetable patch.

I've always read that gladiola isn't hardy for northern gardeners, and that you have to lift the corms each fall, store them in the winter and replant in spring.

That hasn't proved true in my Zone 5 (Canadian Zone 6) garden over the past five years. When I first planted my gladiola corms, I dug them up in the fall and went through the whole business of storing them in the basement and replanting.

Then one year I decided not to bother - if I wanted them again, I'd just buy them. It was a very cold winter, and so I was surprised to see glads come up where they had grown the previous season.

That particular batch kept going until we finally grassed the spot over. It was the mowing that finally did them in.

I planted the ones I have now three years ago. An apricot cultivar whose name I don't know is shown here (I've had a most enjoyable weekend playing with my camera). Each spring I wonder if they're toast, but at least so far they have just kept on keeping on. Chalk up another happy accident in the garden!

I've love to hear from northern gardeners who have had similar experiences. We don't have reliable snow cover where I live in southern Ontario, so I wonder if they're surviving because of deep planting. I dig a trench when planting, so the glad corms go in quite deep - about 8 to 10 inches. Our soil is amended clay loam that's well-drained.

By the way, I buy my glads through Vesey's Seeds. They ship to customers in Canada and the US.

More on happy accidents next time.

Thursday, July 27, 2006

Dahlberg daisy and happy accidents


I love happy accidents in the garden, especially when they're self-sown annuals that I don't expect to be hardy in my USDA Zone 5 garden.

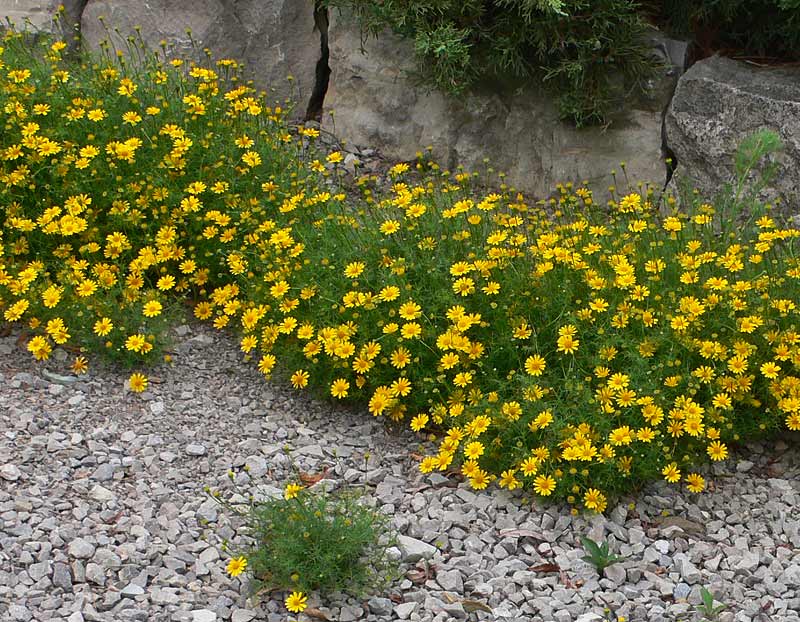
Several years ago, I planted a little annual called Dahlberg daisy in a corner of the bed that lines our driveway.

I grew Dahlberg daisy from seed when I was in my mad seed-growing phase. It's a bushy, branched little plant about six to 10 inches tall with lots of small yellow daisy flowers and threadlike leaves that have an aromatic, citrus-like scent. I intended it for containers, but had a few plants left over and put them in the ground along a low stone wall.

To my delight, these daisies have been reappearing in the gravel driveway below the wall each summer. It takes until mid-July for them to get to blooming size and then they cheerfully bloom their heads off for the rest of the summer.

In reading up about Dahlberg daisy, I found that it thrives in sunny, well drained, sandy soil with a pH of 6.8 or higher and that it is quite drought tolerant - no wonder it loves growing in the gravel here.

This year, the plants started to grow during a period of drought in May and June. I'm amazed at how tenacious they are - I didn't expect them to do as well as previous years because of the dryness. (The drought broke with lots of thunderstorms, but that is another story.)

Dahlberg daisy isn't readily available in cell packs at garden centers, so if you want it, you need to start the plants from seed. This isn't hard, but it's a good idea to start the seeds indoors as it takes about four months from sprouting to blooming. (Tips on how to grow from seed are here.)

I think of Dahlberg daisy as a great rock garden plant for mid-summer when most of the alpine perennials have finished blooming. Stick in a few Dahlberg daisies, and your rock garden will come to life again, just like my driveway does.

With its self-seeding tendencies, you'll probably only have to grow it from seed once. Even though Dahlberg daisy reseeds, I don't find that it gets weedy - and if it grows where you don't want it, well, the seedlings are really easy to pull out.

By the way, Thymophylla tenuiloba is the botanical name and the plant is native to south central Texas and northern Mexico. Seed companies offer it under the name Dahlberg daisy or Golden Fleece.

Find Dahlberg daisy at Stokes Seeds.

Thursday, July 20, 2006

Favorite gardening footwear


Some gardeners swear by slip-on clogs, others wear old sneakers or a favorite pair of boots.

I can't live without my trusty Australian-made Blundstone boots.

I was introduced to them by a garden designer friend who spends a lot of time on landscape construction sites.

The best thing about them is this, and it comes right from one of their advertising slogans: "No damn laces!"

My Blundies are light enough take me through the summer's gardening and dog-walking.

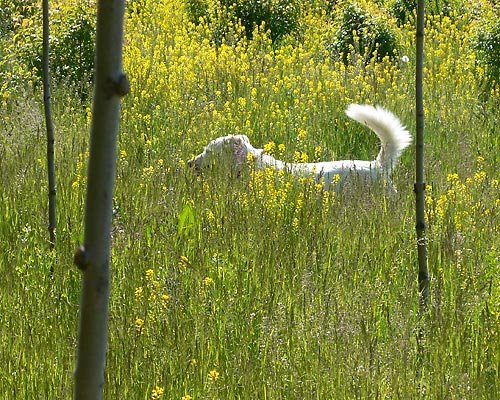
We walk at the neighboring tree farm behind our farm, kind of a rough place of dirt roads and tall grass – definitely not sandal territory.

That's my dog, Toby, happily nosing around.

Here's a link to the boots: Canadian site.
For the US site, click here and
here for the Australian site.

Tuesday, July 18, 2006

Barn swallow babies


Over the past couple of weeks, our barn swallow babies have learned to fly and have discovered the big world out there.

Having barn swallows around is a bit like expanding one's pet population by a dozen or two. Each morning we wake up to very clear demands to open the barn doors. When we do, a number of parents fly out and others fly in. The flights continue until dark.

Our "barn" is a drive shed which houses our mowers, garden tools, my husband's stone carving studio (off limits to the birds) and a two-car garage. Usually the swallows build their nests and lay their eggs up high near the top of barn, well away from the garage part of the building, which has a very low ceiling.

But some summers, the swallow "condos" up top get filled up fast by several nesting pairs, leaving the pair that's lowest on the totem pole to nest in the garage. This makes taking the car in and out a bit of an adventure after the babies hatch and Mom and Dad get very protective.

With a long lens and flash, I was able to take pictures of the garage swallow babies at feeding-time without upsetting them too much.

The swallow parents are tireless when feeding the little guys, and they're great fun to watch as they buzz and swoop by the nest to encourage the babies to try their wings. The little ones grow to flying stage astonishingly quickly.

We enjoy our swallow flock, but we're always relieved when we can walk by the barn without being buzzed by fly-bys - and when we can finally clean up the bird droppings.

Sunday, July 16, 2006

When it rains, it pours

When it's hot and dry, plants suffer. But even gardeners get drought-stressed: I'm a bad case – drought makes me cranky and anxious, even questioning my commitment to gardening.

This happens despite the fact that I grow mostly plants that can tolerate a lot of dryness. I get drought-stressed because I'm a perfectionist. My garden hasn't a hope in heck of looking its best if it never rains – a big concern when there are garden tours coming.

I also hate having to drag hoses around, trying to remember which plants need watering. (Anything recently planted that hasn't had time to develop good roots needs attention.) Not only that, I worry about running cisterns dry and burning out pumps. And if it doesn't rain, I have to buy extra water, as our well water has to be reserved for the house.

This year we had very little rain in May and June, which worried me because that's when most plants make their annual growth spurt. May brought less than 3 inches (2 inches and 8/10ths to be exact) and June was even drier (only an inch and three quarters). Luckily, temperatures stayed on the cool side, a big improvement over June 2005 when we had both drought and an early heat wave that lasted for days. Talk about high anxiety!

Last year, thunderstorms finally came to the rescue in July, and so it was last week too. We finally got rain – in buckets. It came down three times, twice torrentially: The week's total was - insert drumroll - 5 and ¾ inches!

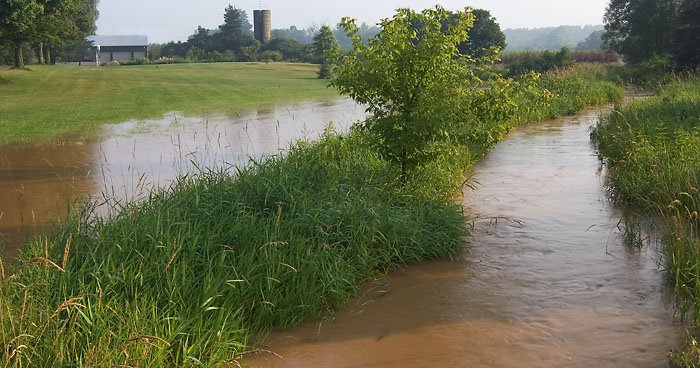
The picture below shows the flooding down at our creek after the last bout of rain brought one-and-a-half inches overnight when the ground was already saturated.


That was in the morning. By afternoon, things were still soggy, but the flood waters had receded.

The rain was exactly we needed and it came in the nick of time to help the garden (and the gardener) weather the current heat wave. Thank you, thunderstorms! Sometimes you just get lucky.

Garden mulching survey

I've always strongly advocated garden mulch, especially for people with big country gardens. (We buy wood chip mulch by the dump-truck load.)

So I was interested to read what perennials expert John Valleau, the chief horticulturist for the wholesale grower Heritage Perennials, had to say recently about the results of a reader survey he did on garden mulching techniques.

In his May 2006 Perennials.com newsletter, he had given the standard advice to always taper the mulch down to nothing immediately around the crowns and stems of perennials to avoid problems with rotting.

Then Quebec-based garden writer Larry Hodgson wrote in to say he thought that was all a garden myth. So, John asked his newsletter readers for their observations.

Here's what he had to say about the results in his July newsletter:

I was literally flooded with responses this month. Wow! Mulching must be a very hot topic, and here I was anticipating only a handful of entries.

I've taken some time to analyze the data, and the results for the #1 question on whether to taper the mulch or to pile it evenly around perennials worked out this way:

• 85% — spread mulch evenly over the bed
• 7% — doesn't matter, or depends on the particular plant
• 8% — taper the mulch or rotting may be a problem

BENEFITS of mulching you mentioned included: reduced watering, because the mulch holds the moisture in the soil; cooler roots during summer heat; greatly reduced weed seed germination (figures in the 80% fewer weeds were mentioned a few times); mulches add beneficial organic matter; mulches encourage plenty of soil microbes, worms and other beneficial critters; mulch looks aesthetically pleasing.

The most important thing you reported over and over again is that mulching seems to make your perennials grow better!

Read the entire mulch article. It turns out that you can spread mulch a lot thicker than many experts tell you without doing harm to your perennials.

Saturday, June 17, 2006

Snappy crossing


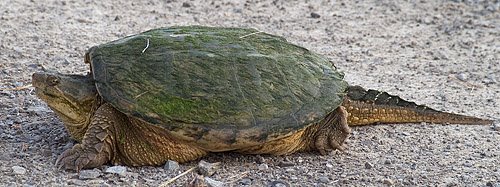
I was out one evening recently taking flower photos, when I noticed something on our laneway. When I went to investigate, I saw that it was a huge snapping turtle headed towards our farm pond.

It took me a few minutes to realize that this was a "photo opportunity." It's odd how once your head is in one mode (flower photography) that it takes a few minutes to realize that a turtle in the laneway would be interesting to photograph too.

Anyway, I ran to get my telephoto lens, so I wouldn't have to scare the turtle by getting too close, and here are the results. Is this a face only a mother could love?


Poor turtle. She froze while I took pictures of her. After I stopped taking pictures and returned to the flowers, she finally felt safe enough to continue to the pond.

We have a south-facing hill around our house that would be perfect for turtle-egg laying. Perhaps she laid her eggs there.